Wendy’s Chili Recipe (Copycat)
If you’re looking for a cozy meal that warms your heart and fills your belly, you’ve landed on the right recipe! This Wendy’s Chili Recipe (Copycat) is a true comfort food classic that’s perfect for chilly evenings or busy weeknights. It’s a dish that brings everyone together—whether you’re hosting a game day gathering or just enjoying a quiet dinner with the family, this chili is sure to please.
What I love most about this recipe is its hearty flavor and how easy it is to make. With simple ingredients and straightforward steps, you can whip up a big pot of chili that tastes like it simmered all day. Plus, it’s one of those meals that gets better as leftovers, making it a fantastic option for meal prep!
Why You’ll Love This Recipe
- Quick to prepare: With only 10 minutes of prep time, you can have this delicious chili on the table in no time.
- Family-friendly: Kids and adults alike will enjoy this savory dish, making it perfect for family dinners.
- Make ahead: This chili can be made in advance and stored in the fridge or freezer, making weeknight meals a breeze!
- Versatile flavors: Customize the spice level or add extra veggies to suit your family’s taste preferences.
Ingredients You’ll Need
Gathering these simple, wholesome ingredients is half the fun! You probably have many of them in your pantry already. Here’s what you’ll need to create this delightful chili:
For the Chili
- 1 lb lean ground beef
- 1 small onion (diced)
- 1 stalk celery (diced)
- 1 small green pepper (chopped)
- 1 tablespoon cooking oil
- 10 oz. Rotel (tomatoes with green chilies)
- 28 oz. stewed tomatoes
- 14 oz. kidney beans (do not drain)
- 14 oz. pinto beans (do not drain)
- 14 oz. tomato sauce
- 1.25 oz. dry chili seasoning
- 1 tablespoon white vinegar
Variations
This recipe is wonderfully flexible! Feel free to adapt it based on what you have on hand or your personal preferences.
- Swap the protein: Use ground turkey or chicken instead of beef for a lighter version.
- Add more veggies: Toss in some corn or diced zucchini for extra nutrition and flavor.
- Spice it up: If you love heat, add some diced jalapeños or a pinch of cayenne pepper.
- Make it vegan: Replace ground beef with lentils or mushrooms for a plant-based twist.
How to Make Wendy’s Chili Recipe (Copycat)
Step 1: Brown the Beef and Vegetables
Start by adding your lean ground beef, diced onion, diced celery, chopped green pepper, and cooking oil into a large stock pot over medium-high heat. Cook until the beef is browned—this usually takes about 8-10 minutes. Season generously with salt and black pepper during this step; it adds depth to the flavor! Don’t forget to drain any excess grease if necessary.
Step 2: Mix in the Tomatoes and Beans
Once your beef mixture is cooked through, it’s time to add in all those flavorful canned goodies! Stir in the Rotel tomatoes, stewed tomatoes, undrained kidney beans, pinto beans, tomato sauce, and dry chili seasoning. Mixing these together ensures every bite has that hearty chili flavor we all love.
Step 3: Simmer Deliciously
Now that everything is combined, reduce the heat to low and cover your pot. Let it simmer for 1 hour—this is where all those flavors meld beautifully together! Stir occasionally and enjoy the delicious aroma wafting through your kitchen.
Step 4: Add a Tangy Kick
After an hour of simmering bliss, stir in the white vinegar. This little addition brightens up the flavors and adds a lovely tanginess that makes each spoonful pop!
Step 5: Serve and Enjoy!
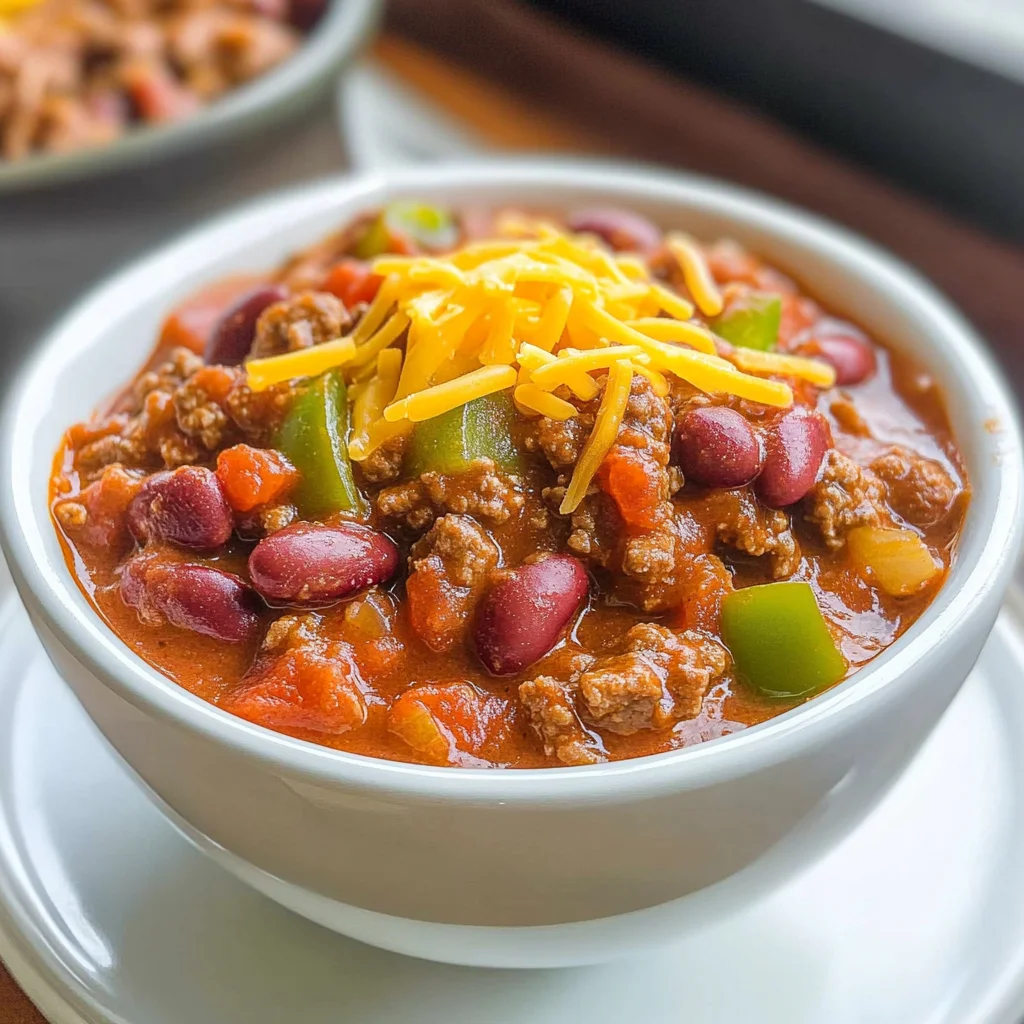
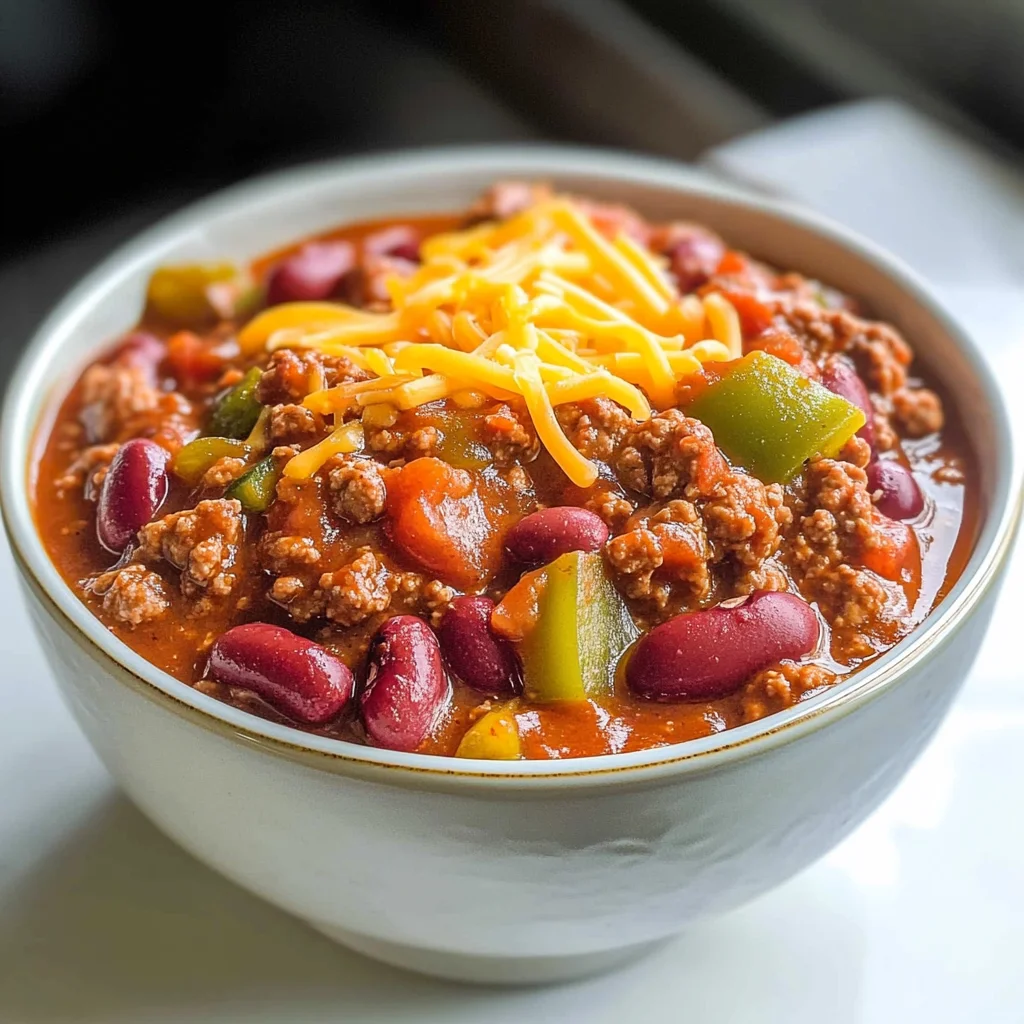
Your Wendy’s Chili Recipe (Copycat) is now ready to be served! Ladle generous portions into bowls and top with shredded cheddar cheese if desired. Sit back, relax, and enjoy every warm bite of this comforting dish!
Pro Tips for Making Wendy’s Chili Recipe (Copycat)
Making a delicious chili can be simple and rewarding with just a few extra tips!
-
Choose the right beef: Opt for lean ground beef to keep the dish hearty without being too greasy. This helps the flavors shine through while keeping it healthy.
-
Don’t skip the veggies: Adding diced onion, celery, and green pepper not only enhances the flavor but also boosts the nutritional value of your chili. A little extra veggie goodness never hurts!
-
Let it simmer: Allowing your chili to simmer for at least an hour is crucial for developing rich flavors. The longer it cooks, the better the taste, as all the ingredients meld together beautifully.
-
Adjust seasoning to taste: Every palate is different! After simmering, take a moment to taste and adjust seasonings as needed. A pinch more salt or another dash of chili seasoning can transform your dish.
-
Make it ahead of time: Chili often tastes even better the next day after the flavors have had time to mingle. Consider making a larger batch so you can enjoy leftovers throughout the week!
How to Serve Wendy’s Chili Recipe (Copycat)
Serving your chili can be just as enjoyable as making it! Here are some fun ideas to elevate your dining experience.
Garnishes
- Chopped green onions: Fresh green onions add a mild oniony crunch that complements the warm chili perfectly.
- Sour cream or Greek yogurt: A dollop of sour cream or Greek yogurt provides a creamy contrast that balances out the spices in your chili.
Side Dishes
- Cornbread: Sweet and buttery cornbread is a classic pairing with chili, providing a delightful contrast in texture and flavor.
- Rice: Serving your chili over rice makes for a filling meal and helps soak up all that delicious sauce.
- Tortilla chips: Crunchy tortilla chips serve as an excellent scoop for your chili and add an extra layer of flavor.
- Simple garden salad: A light garden salad with vinaigrette can refresh your palate between bites of savory chili, making for a well-rounded meal.
Enjoy diving into this cozy bowl of homemade goodness! Your friends and family will appreciate both the heartwarming flavors and the effort you’ve put into making this delightful dish.
Make Ahead and Storage
This Wendy’s Chili Recipe (Copycat) is perfect for meal prep! Not only does it taste better the next day, but it also makes it easy to enjoy a delicious homemade meal throughout the week.
Storing Leftovers
- Allow the chili to cool completely before storing.
- Transfer leftovers into an airtight container.
- Store in the refrigerator for up to 3-4 days.
Freezing
- Let the chili cool completely.
- Place in freezer-safe containers or heavy-duty freezer bags.
- Label with the date and freeze for up to 3 months.
Reheating
- For stovetop reheating, place chili in a pot over medium heat, stirring occasionally until heated through.
- For microwave reheating, transfer to a microwave-safe bowl and heat in 1-minute intervals, stirring in between until warm.
FAQs
Here are some common questions about this cozy dish:
Can I make Wendy’s Chili Recipe (Copycat) without meat?
Absolutely! You can substitute the ground beef with a plant-based alternative like lentils or textured vegetable protein for a delicious vegetarian version.
How do I spice up my Wendy’s Chili Recipe (Copycat)?
If you like it spicy, consider adding diced jalapeños or a splash of hot sauce. You can also increase the amount of dry chili seasoning according to your taste.
Can I use canned beans for Wendy’s Chili Recipe (Copycat)?
Yes, using canned beans is not only convenient but also saves time! Just be sure to rinse them if you’d prefer less sodium.
How long can I store Wendy’s Chili Recipe (Copycat)?
You can store it in your refrigerator for up to 3-4 days or freeze it for up to 3 months, making it perfect for meal prep!
Final Thoughts
Thank you for joining me on this delicious journey of creating Wendy’s Chili Recipe (Copycat)! This recipe not only warms your soul but also brings friends and family together around the dinner table. I hope you find joy in making this hearty dish and that it becomes a staple in your home. Happy cooking!
Wendy’s Chili Recipe (Copycat)

Experience the warmth and comfort of homemade Wendy’s Chili with this easy-to-follow copycat recipe. Perfect for cozy nights or busy weeknights, this chili is packed with hearty flavors that bring everyone together. Made with lean ground beef and a medley of beans, it’s both savory and satisfying. Not only does it come together quickly with just 10 minutes of prep time, but it also makes for fantastic leftovers. Whether you’re hosting a game day gathering or enjoying a family dinner, this chili is sure to please.
- Prep Time: 10 minutes
- Cook Time: 60 minutes
- Total Time: 1 hour 10 minutes
- Yield: Serves approximately 6
- Category: Dinner
- Method: Simmering
- Cuisine: American
Ingredients
- 1 lb lean ground beef
- 1 small onion (diced)
- 1 stalk celery (diced)
- 1 small green pepper (chopped)
- 1 tablespoon cooking oil
- 10 oz Rotel (tomatoes with green chilies)
- 28 oz stewed tomatoes
- 14 oz kidney beans (do not drain)
- 14 oz pinto beans (do not drain)
- 14 oz tomato sauce
- 1.25 oz dry chili seasoning
- 1 tablespoon white vinegar
Instructions
- In a large stock pot over medium-high heat, add lean ground beef, diced onion, diced celery, chopped green pepper, and cooking oil. Cook until the beef is browned, about 8-10 minutes. Drain excess grease if necessary.
- Stir in Rotel tomatoes, stewed tomatoes, undrained kidney beans, pinto beans, tomato sauce, and dry chili seasoning until well combined.
- Reduce heat to low and cover the pot. Allow to simmer for 1 hour, stirring occasionally.
- After simmering, stir in the white vinegar for added tanginess.
- Serve hot in bowls and enjoy!
Nutrition
- Serving Size: 1 cup (240g)
- Calories: 305
- Sugar: 6g
- Sodium: 632mg
- Fat: 11g
- Saturated Fat: 4g
- Unsaturated Fat: 6g
- Trans Fat: 0g
- Carbohydrates: 35g
- Fiber: 9g
- Protein: 20g
- Cholesterol: 60mg