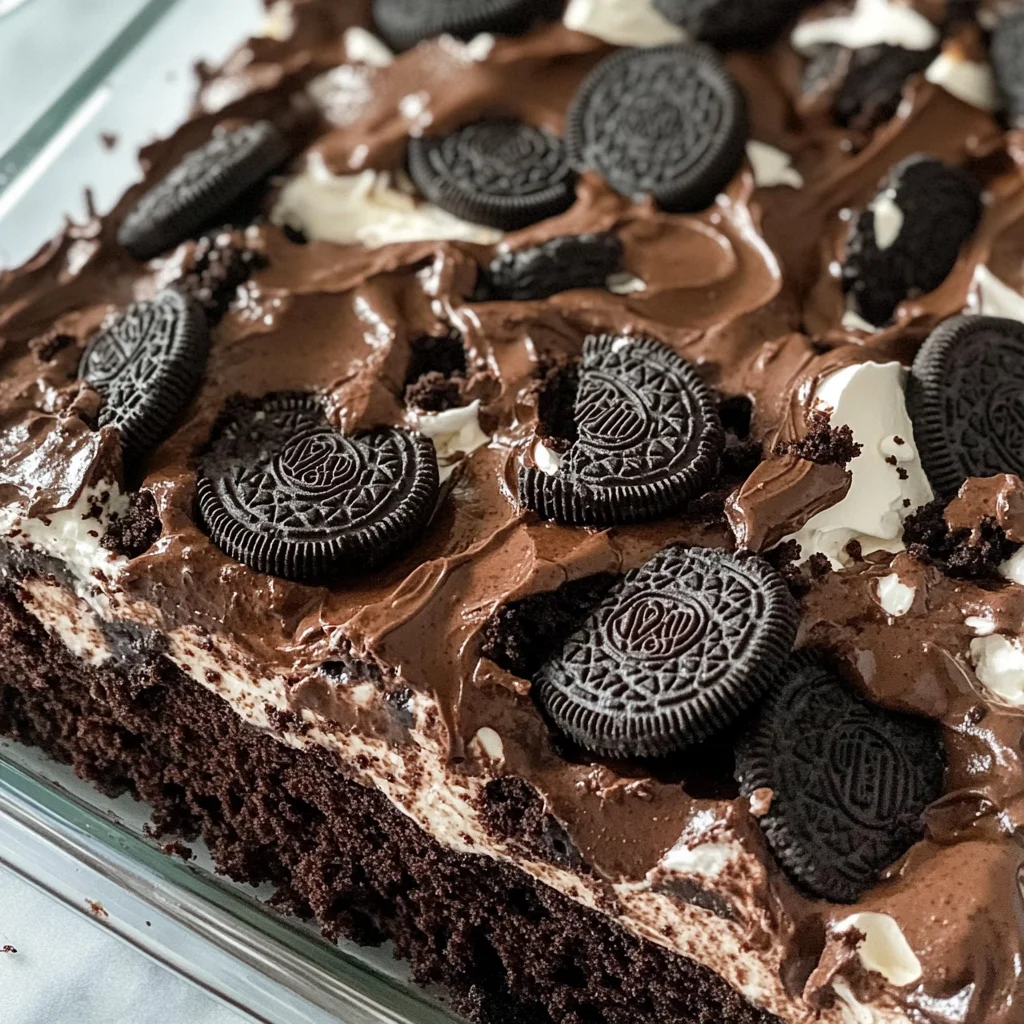
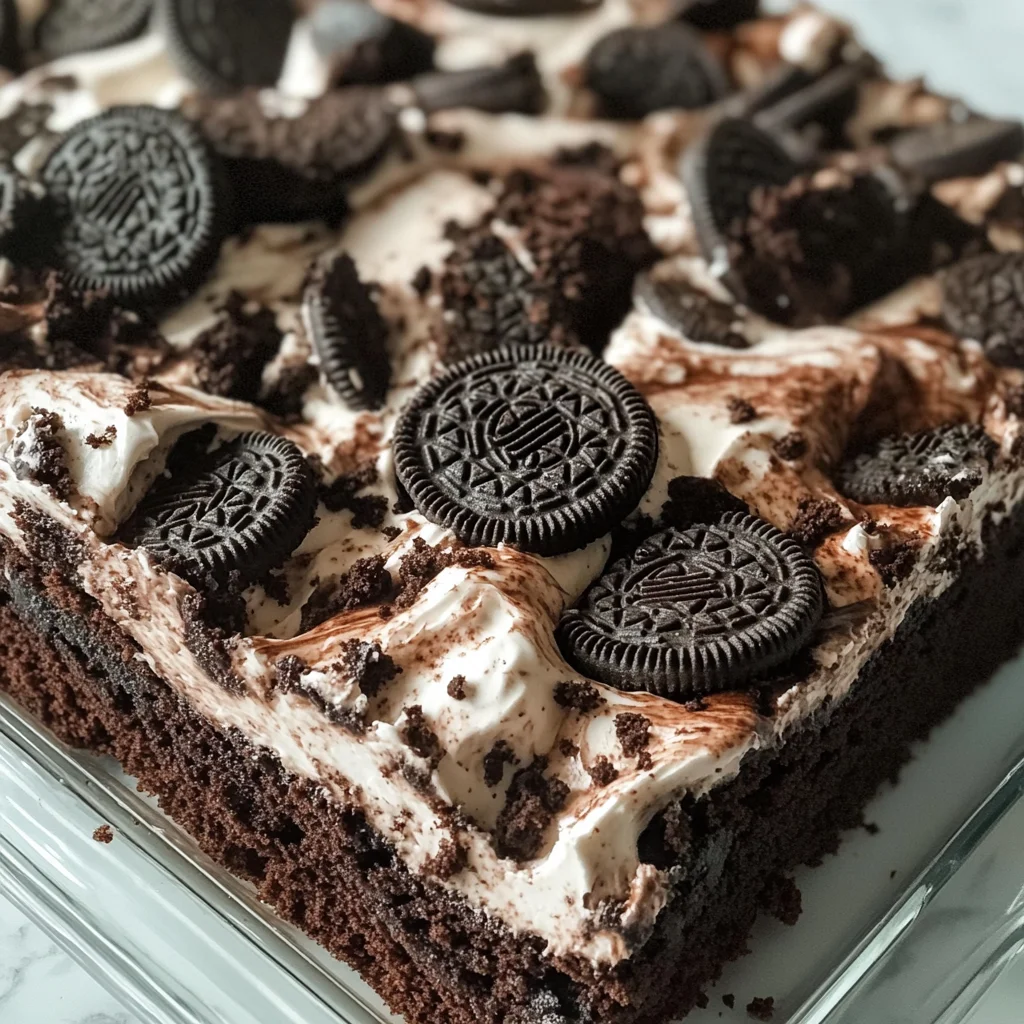
Oreo Dump Cake
If you’re looking for a dessert that’s as easy to make as it is delicious, then this Oreo Dump Cake is just the ticket! Imagine layers of creamy Cool Whip and rich chocolate cake mix, all topped with crunchy Oreo cookies. It’s a crowd-pleaser that comes together in no time and will have everyone asking for seconds. Whether you’re planning a cozy family night or need a quick treat for a potluck, this recipe will shine at any gathering!
What makes this Oreo Dump Cake truly special is its gooey texture and rich flavor, thanks to the sweetened condensed milk that brings everything together. It’s incredibly simple to whip up, so you can enjoy more time with your loved ones instead of being stuck in the kitchen!
Why You’ll Love This Recipe
- Quick to Prepare: With just 10 minutes of prep time, you can have this delightful dessert in the oven before you even finish your coffee!
- Family-Friendly: Kids and adults alike will love digging into layers of chocolatey goodness; it’s sure to become a favorite!
- Minimal Ingredients: This recipe only requires five simple ingredients that you might already have in your pantry.
- Versatile Dessert: Perfect for birthdays, holidays, or just because—this cake fits any occasion!
- Deliciously Decadent: The combination of Oreos, chocolate cake mix, and Cool Whip creates an indulgent treat that’s hard to resist.
Ingredients You’ll Need
Gathering the ingredients for this Oreo Dump Cake is super simple! You’ll find all the items are easy to work with and deliciously satisfying. Here’s what you need:
For the Cake
- 20 Oreo cookies
- 14 oz sweetened condensed milk (1 can)
- 1 (8 oz) container Cool Whip, thawed
- 1 box chocolate cake mix
- ¾ cup unsalted butter (1½ sticks or 12 tablespoons), cut into small pats
Variations
One of the best parts about this recipe is its flexibility! Feel free to get creative with these fun variations:
- Add Some Nuts: Toss in some chopped walnuts or pecans for an extra crunch.
- Mix in Chocolate Chips: For chocoholics, fold in some semi-sweet or dark chocolate chips for added richness.
- Swap the Cookies: Experiment with different cookie flavors like peanut butter or mint Oreos for a unique twist.
- Top with Fresh Fruit: Fresh berries or sliced bananas on top can add a refreshing touch to each slice.
How to Make Oreo Dump Cake
Step 1: Preheat the Oven
Start by preheating your oven to 350°F (175°C). This ensures that your cake will bake evenly. While it’s heating up, take a moment to lightly grease a 9×13-inch baking dish with butter or non-stick spray—this will help your cake come out easily once it’s baked.
Step 2: Layer the Oreos
Next, take 10 Oreo cookies and arrange them in a single layer across the bottom of your prepared dish. This base layer adds a delightful crunch and sets the stage for all that deliciousness to come!
Step 3: Add Condensed Milk and Cool Whip
Now it’s time for the magic! Pour the sweetened condensed milk evenly over the Oreos. Then, gently spread the thawed Cool Whip over the milk using a spatula. This creamy layer adds sweetness and helps create that gooey texture we all love.
Step 4: Add Remaining Ingredients
Sprinkle the entire box of chocolate cake mix evenly over the Cool Whip layer. Make sure there are no lumps by using a fork to break up any clumps in the cake mix; this step is important for even baking!
Step 5: Top with Butter
Distribute small pats of butter evenly over the surface of the cake mix. Resist stirring or mixing at this point! The butter will melt during baking, creating a deliciously crisp topping.
Step 6: Bake
Now pop your creation into the oven and bake for about 40–45 minutes. Keep an eye on it until it’s bubbly around the edges and slightly crisp on top. Once it’s done, allow it to cool for a few minutes before serving warm—trust me; it’s worth waiting just a bit!
Enjoy making this scrumptious Oreo Dump Cake! It’s bound to bring smiles all around!
Pro Tips for Making Oreo Dump Cake
Making an Oreo Dump Cake is as easy as pie, but a few insider tips can make your dessert even more delightful!
-
Use fresh ingredients: Ensure your Cool Whip and sweetened condensed milk are fresh for the best flavor and texture. Fresh ingredients contribute to a creamier consistency and richer taste.
-
Don’t mix the layers: After adding the cake mix and butter, resist the urge to stir! Keeping the layers separate allows for that perfect gooey texture when baked, creating a delicious contrast of flavors.
-
Experiment with flavors: Feel free to swap out regular Oreos for flavored ones, like mint or peanut butter. This simple change can add a fun twist to your dessert and surprise your guests!
-
Let it cool slightly: While it’s tempting to dive right in, letting the cake cool for a few minutes allows it to set up a bit more. This way, you’ll be able to serve it in neat squares instead of a gooey mess.
-
Serve warm or chilled: This cake is delicious both ways! Serving it warm gives you that comforting, melty experience while chilling it enhances its creaminess, making it perfect for hot days.
How to Serve Oreo Dump Cake
Serving your Oreo Dump Cake can be just as fun as making it! With a touch of creativity, you can present this dessert in various delightful ways that will impress your friends and family.
Garnishes
- Chocolate syrup: Drizzling chocolate syrup over individual servings adds an extra layer of sweetness and visual appeal.
- Crushed Oreos: Sprinkling crushed Oreos on top not only enhances the presentation but also adds a delightful crunch with every bite.
- Whipped cream: A dollop of whipped cream on each serving brings an airy lightness that perfectly complements the richness of the cake.
Side Dishes
- Fresh fruit salad: A refreshing fruit salad provides a burst of color and balances the sweetness of the dump cake with natural acidity.
- Vanilla ice cream: Creamy vanilla ice cream is a classic pairing that melts beautifully into the warm cake for an indulgent treat.
- Coffee or tea: Offering coffee or tea alongside this dessert creates a cozy atmosphere and helps cut through the richness with their aromatic qualities.
- Chocolate-covered strawberries: These treats add elegance and are perfect for dipping into the gooey goodness of your dump cake—who could resist?
With these serving suggestions and pro tips, your Oreo Dump Cake will not only taste incredible but look fantastic too! Enjoy sharing this delightful dessert at your next gathering!
Make Ahead and Storage
This Oreo Dump Cake is not just a delightful treat to enjoy fresh out of the oven; it also shines when it comes to meal prep. You can prepare this dish in advance, making it perfect for busy days or gatherings.
Storing Leftovers
- Allow the cake to cool completely before storing.
- Cover the cake with plastic wrap or transfer it to an airtight container.
- Store in the refrigerator for up to 3-4 days.
Freezing
- Let the cake cool completely, then cut into portions.
- Wrap each piece in plastic wrap and place them in a freezer-safe bag or container.
- Freeze for up to 2 months for best quality.
Reheating
- To reheat, remove the cake from the refrigerator or freezer.
- If frozen, allow it to thaw in the fridge overnight.
- Reheat individual portions in the microwave for about 20-30 seconds or until warmed through.
FAQs
Got questions? No worries! Here are some common inquiries about this delicious dessert.
Can I make Oreo Dump Cake ahead of time?
Absolutely! You can prepare this Oreo Dump Cake a day in advance and store it covered in the fridge. It tastes great even after chilling!
What can I serve with Oreo Dump Cake?
Oreo Dump Cake pairs wonderfully with vanilla ice cream or whipped topping. The contrast of warm cake and cold ice cream is simply divine!
Can I use other cookies instead of Oreos?
Yes! While Oreos are classic, you can experiment with other chocolate sandwich cookies or even graham crackers for a different flavor profile.
How do I ensure my Oreo Dump Cake turns out perfectly?
Make sure not to mix the layers after adding butter on top of the cake mix—this helps create that signature gooey texture. Also, keep an eye on baking time!
How many servings does this Oreo Dump Cake yield?
This recipe yields approximately 12 servings, making it perfect for sharing at gatherings or potlucks!
Final Thoughts
I hope you find joy in making this easy and indulgent Oreo Dump Cake! It’s such a crowd-pleaser that brings smiles with every bite. Whether you’re serving it at a party or enjoying a slice at home, it’s bound to become a favorite. Don’t hesitate to try it out—I can’t wait for you to experience this chocolaty delight!
Oreo Dump Cake

If you’re craving a delectable dessert that’s as simple to make as it is satisfying, this Oreo Dump Cake is the perfect choice! With layers of creamy Cool Whip, rich chocolate cake mix, and crunchy Oreo cookies, this treat is sure to impress at any gathering. It’s quick to prepare, taking just 10 minutes before it goes into the oven, giving you more time to enjoy with family and friends. The gooey texture is enhanced by sweetened condensed milk, making each bite an indulgent experience. Whether for a family night or a potluck, this cake will be a favorite on any dessert table.
- Prep Time: 10 minutes
- Cook Time: 45 minutes
- Total Time: 55 minutes
- Yield: Approximately 12 servings 1x
- Category: Dessert
- Method: Baking
- Cuisine: American
Ingredients
- 20 Oreo cookies
- 14 oz sweetened condensed milk (1 can)
- 1 (8 oz) container Cool Whip, thawed
- 1 box chocolate cake mix
- ¾ cup unsalted butter (1½ sticks), cut into small pats
Instructions
- Preheat your oven to 350°F (175°C) and lightly grease a 9×13-inch baking dish.
- Arrange 10 Oreo cookies in a single layer at the bottom of the prepared dish.
- Pour sweetened condensed milk evenly over the Oreos, then gently spread the Cool Whip on top.
- Sprinkle the entire box of chocolate cake mix over the Cool Whip layer; do not mix.
- Top with small pats of butter evenly distributed across the surface.
- Bake for about 40–45 minutes until bubbly around the edges and slightly crisp on top. Allow to cool slightly before serving warm.
Nutrition
- Serving Size: 1 piece (approximately 150g)
- Calories: 320
- Sugar: 23g
- Sodium: 220mg
- Fat: 16g
- Saturated Fat: 10g
- Unsaturated Fat: 5g
- Trans Fat: 0g
- Carbohydrates: 41g
- Fiber: 1g
- Protein: 3g
- Cholesterol: 30mg