Pumpkin Patch Deviled Eggs
If you’re looking for a delightful twist on a classic appetizer, then these Pumpkin Patch Deviled Eggs are a must-try! Perfect for autumn gatherings or even just a cozy family dinner, this recipe brings the spirit of fall to your table. The vibrant colors and playful presentation make them a hit with both kids and adults alike. Plus, they’re super easy to whip up, so you can enjoy more time with your loved ones and less time in the kitchen.
These deviled eggs are not only visually appealing but also packed with flavor. With creamy yolks and a hint of spice, they are sure to impress! Whether it’s for Halloween parties, Thanksgiving feasts, or simply enjoying an afternoon snack, Pumpkin Patch Deviled Eggs will become a favorite in no time.
Why You’ll Love This Recipe
- Easy to Prepare: These deviled eggs come together quickly with simple steps that anyone can follow.
- Family-Friendly Fun: Kids love helping out by piping the filling and decorating their pumpkin eggs!
- Make-Ahead Convenience: You can prepare these ahead of time, making them perfect for busy days.
- Festive Presentation: The charming pumpkin shape adds fun flair to any gathering or holiday table.
- Deliciously Creamy Flavor: The combination of mayonnaise and mustard creates a rich filling everyone will love.
Ingredients You’ll Need
You’ll be happy to know that this recipe calls for simple, wholesome ingredients that you likely already have in your kitchen. Let’s gather everything we need for these delightful Pumpkin Patch Deviled Eggs!
- 6 large eggs
- 1/4 cup mayonnaise
- 1 teaspoon yellow mustard
- 1/4 teaspoon salt
- 1/8 teaspoon black pepper
- 1/2 teaspoon paprika, plus more for dusting
- A tiny dash of orange food coloring (optional, for vibrant pumpkin color)
- 2 tablespoons fresh chives, finely chopped (for stems and garnish)
Variations
One of the best things about Pumpkin Patch Deviled Eggs is how flexible they are! Feel free to get creative and customize the flavors based on your preferences. Here are some fun variation ideas:
- Add Some Heat: If you love a bit of spice, mix in some diced jalapeños or a dash of hot sauce into the yolk mixture.
- Herb It Up: Experiment with different herbs like dill or parsley instead of chives for unique flavor twists.
- Creamy Avocado: Swap out some mayonnaise for mashed avocado to add creaminess and healthy fats.
- Cheesy Delight: Stir in some shredded cheese like cheddar or feta into the yolk mixture for added richness.
How to Make Pumpkin Patch Deviled Eggs
Step 1: The Foolproof Easy Peel Method
Start by carefully placing your eggs in a single layer in a saucepan. Cover them with cold water by about an inch. Bring the water to a rolling boil over high heat. Once boiling rapidly, immediately remove the pan from heat, cover it with a lid, and let the eggs sit for exactly 10 minutes. This precise timing is key; it prevents overcooking while ensuring easy peeling later!
Step 2: Prepare an Ice Bath
While your eggs are sitting in their hot bath, prepare an ice bath by filling a large bowl with ice and water. After those 10 minutes are up, use a slotted spoon to transfer the hot eggs directly into this refreshing ice bath. Allow them to cool completely for at least 5 minutes. This quick cooling step helps the egg contract inside its shell—making peeling so much easier.
Step 3: Peeling Perfection
Once cooled, gently tap each egg on a hard surface until the shell is cracked all over. Roll the egg between your hands to loosen it up further before peeling under cool running water. You’ll find that the shells practically slide off, leaving you with perfectly smooth egg whites—just what we want!
Step 4: Halve & Scoop
Carefully slice each peeled egg in half lengthwise. Gently scoop out the yolks into a small bowl while keeping those beautiful egg whites intact. Arrange them on your serving platter—they’re going to look adorable once filled!
Step 5: Make the Filling
In that bowl of egg yolks, add your mayonnaise, mustard, salt, pepper, and paprika. If you’d like that vibrant pumpkin color, now’s the time to add a tiny dash of orange food coloring! Mash everything together thoroughly with a fork until it’s smooth and creamy—no lumps allowed! For extra smoothness, you can press it through a fine-mesh sieve.
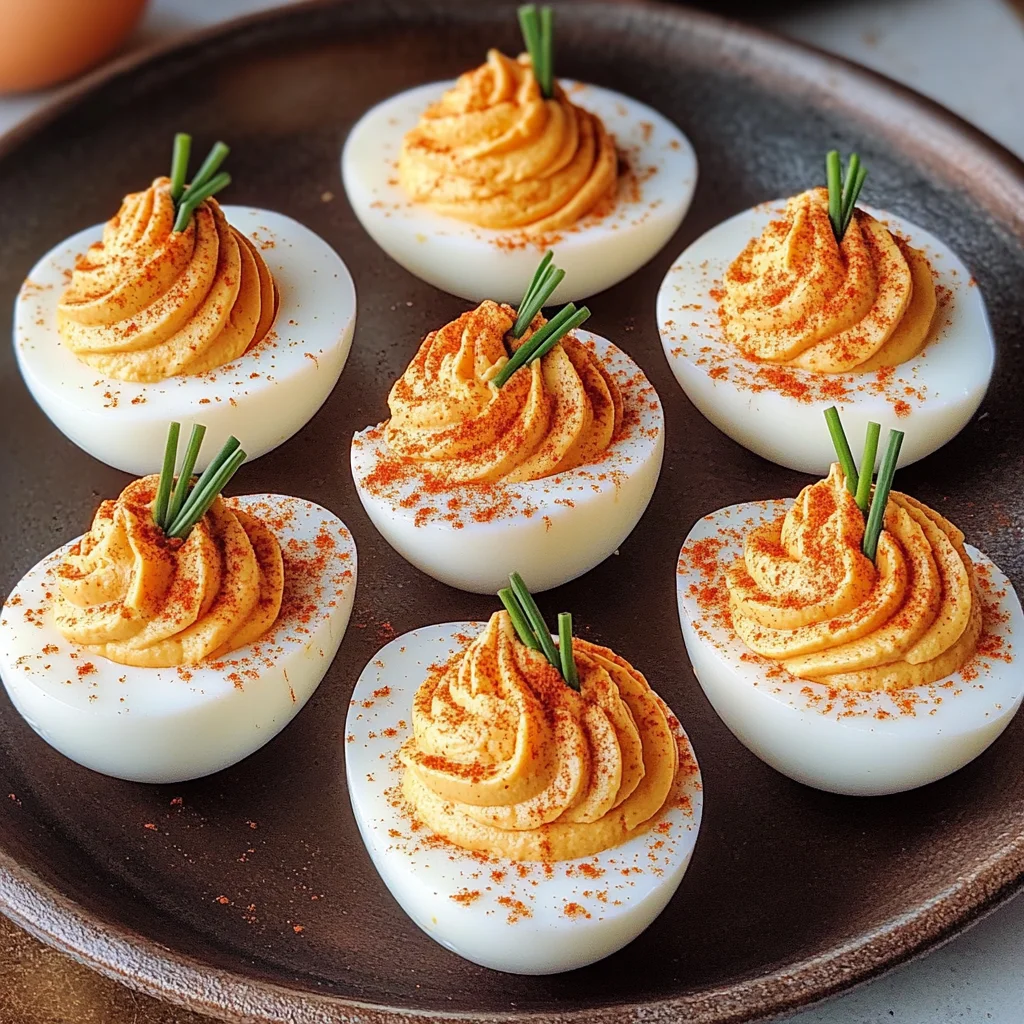
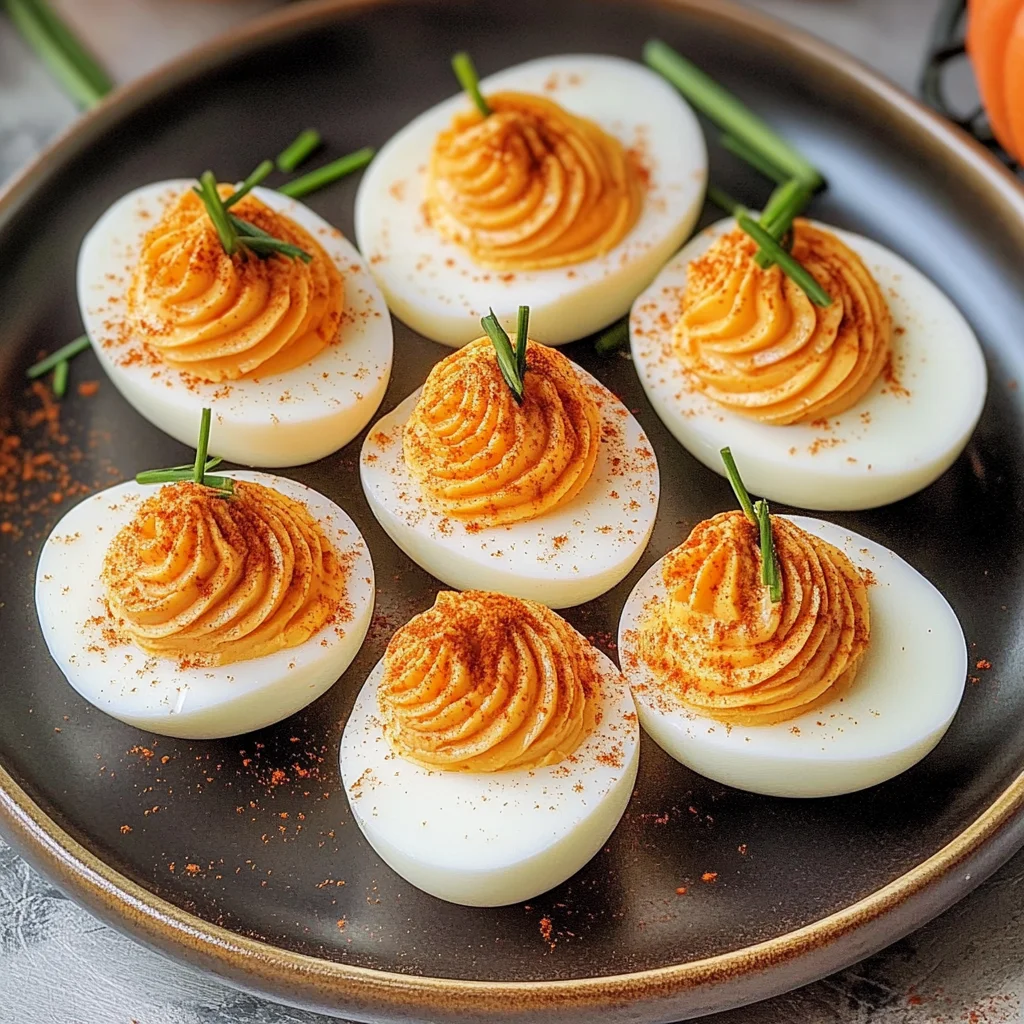
Step 6: Pipe Your Pumpkins
Grab a piping bag fitted with a star tip (like Wilton 1M) and spoon in that creamy yolk mixture. Pipe it into each egg white half using swirls that create plump pumpkin shapes—how fun!
Step 7: Add Some Ridges
To enhance that pumpkin look even more, gently use the dull side of a knife or toothpick to make slight indentations down from the top center of each piped yolk—this mimics those cute pumpkin ridges.
Step 8: Create Stems
For those adorable “stems,” take small bundles of 2-3 chive pieces (about 1/2 to 3/4 inch long) and gently insert them upright into each piped pumpkin’s very top center.
Step 9: Dust & Garnish
Lightly dust your piped pumpkins and egg whites with extra paprika for visual appeal. Sprinkle any remaining chopped chives around the platter as garnish—it makes everything pop!
Step 10: Chill Out!
Finally, chill those festive deviled eggs in the refrigerator for at least 30 minutes before serving so all those delicious flavors meld together beautifully. Enjoy every bite of these perfectly peeled Pumpkin Patch Deviled Eggs!
Pro Tips for Making Pumpkin Patch Deviled Eggs
Making the perfect Pumpkin Patch Deviled Eggs is a delightful experience, especially with these handy tips to ensure they come out beautifully every time!
-
Start with Fresh Eggs: Fresh eggs are easier to peel and yield smoother whites, making your deviled eggs look more appealing. Older eggs can be more challenging to work with, so choose the freshest ones available.
-
Use an Ice Bath: Cooling the eggs quickly in an ice bath after boiling helps prevent overcooking and ensures a tender yolk. This technique also makes peeling much easier.
-
Pipe with Precision: Using a piping bag fitted with a star tip not only makes for an aesthetically pleasing presentation but also allows you to control the amount of filling in each egg white. This helps achieve that perfect pumpkin shape!
-
Add Food Coloring Sparingly: If you choose to use orange food coloring, start with just a tiny dash. You can always add more if needed to achieve your desired vibrancy without overwhelming the dish.
-
Chill Before Serving: Allowing the deviled eggs to chill in the refrigerator for at least 30 minutes before serving enhances the flavors and makes them taste even better. Plus, it gives them time to firm up for easier handling.
How to Serve Pumpkin Patch Deviled Eggs
Presenting your Pumpkin Patch Deviled Eggs in a fun and creative way can elevate your gathering! Here are some ideas to make them shine on your table.
Garnishes
- Chopped Parsley: A sprinkle of fresh parsley adds a pop of color and freshness that contrasts beautifully against the orange yolk mixture.
- Paprika Dusting: A light dusting of paprika not only enhances visual appeal but also adds a hint of smoky flavor that complements the creamy filling.
- Edible Flowers: For an extra touch of whimsy, consider adding small edible flowers as garnishes around your platter. They add color and elegance!
Side Dishes
- Roasted Vegetable Platter: Crisp-tender seasonal vegetables like carrots, bell peppers, and zucchini tossed in olive oil and herbs make for a colorful and healthy side that pairs perfectly with deviled eggs.
- Crispy Potato Wedges: Seasoned potato wedges provide crunch and heartiness that balance well with the creamy texture of the deviled eggs. They’re always a crowd-pleaser!
- Simple Green Salad: A light salad with mixed greens, cherry tomatoes, and a tangy vinaigrette offers a refreshing contrast to the richness of the deviled eggs.
- Cheese Board: Create a cheese board featuring a variety of cheeses, crackers, nuts, and fruits. This allows guests to nibble alongside the deviled eggs while enjoying different flavors.
With these tips and serving suggestions, your Pumpkin Patch Deviled Eggs will be both delicious and visually stunning – perfect for any fall gathering! Enjoy creating this festive treat!
Make Ahead and Storage
These Pumpkin Patch Deviled Eggs are not only a delightful treat but also perfect for meal prep! You can make them ahead of time, ensuring you have a festive appetizer ready to go for any gathering.
Storing Leftovers
- Place any leftover deviled eggs in an airtight container.
- Refrigerate them for up to 3 days.
- To maintain their presentation, place a piece of wax paper between layers if stacking them.
Freezing
- Freezing deviled eggs is not recommended as the texture may be compromised upon thawing. It’s best to enjoy them fresh!
Reheating
- These deviled eggs are best served chilled and do not require reheating.
- If you prefer them at room temperature, take them out of the fridge about 15-20 minutes before serving.
FAQs
If you have questions about making Pumpkin Patch Deviled Eggs, you’re in the right place!
Can I make Pumpkin Patch Deviled Eggs without mayonnaise?
You can substitute mayonnaise with Greek yogurt or a vegan mayo alternative for a lighter option!
How do I ensure my Pumpkin Patch Deviled Eggs look perfect?
To achieve that pumpkin-like appearance, use the piping bag to swirl the yolk mixture and create ridges with a knife or toothpick.
What is the best way to peel hard-boiled eggs for Pumpkin Patch Deviled Eggs?
Using the ice bath method helps in peeling hard-boiled eggs effortlessly and keeps the whites intact.
How long can I store my Pumpkin Patch Deviled Eggs?
You can keep your deviled eggs in the refrigerator for up to 3 days in an airtight container.
Final Thoughts
These Pumpkin Patch Deviled Eggs bring joy and creativity to any table, making your gatherings feel extra special. I hope you enjoy making this festive recipe as much as I do! Whether it’s for Halloween parties or fall celebrations, these little gems are bound to impress. Happy cooking, and don’t forget to share your delightful creations with loved ones!
Pumpkin Patch Deviled Eggs

If you’re seeking a festive twist on a classic appetizer, these Pumpkin Patch Deviled Eggs are the perfect choice! Bursting with autumn flavors and vibrant colors, they’re ideal for Halloween parties, Thanksgiving gatherings, or cozy family dinners. With their playful pumpkin shape and creamy filling, they promise to be a hit with both kids and adults alike. Plus, they are easy to prepare, allowing you to spend more quality time with your loved ones.
- Prep Time: 15 minutes
- Cook Time: 10 minutes
- Total Time: 25 minutes
- Yield: Makes 12 deviled egg halves (serving size is one half) 1x
- Category: Appetizer
- Method: Boiling
- Cuisine: American
Ingredients
- 6 large eggs
- 1/4 cup mayonnaise
- 1 teaspoon yellow mustard
- 1/4 teaspoon salt
- 1/8 teaspoon black pepper
- 1/2 teaspoon paprika (plus more for dusting)
- A dash of orange food coloring (optional)
- 2 tablespoons fresh chives (finely chopped)
Instructions
- Boil the eggs: Place eggs in a saucepan, cover with water, bring to a boil, then remove from heat and cover for 10 minutes.
- Ice bath: Transfer eggs to an ice bath for at least 5 minutes to cool.
- Peel: Tap eggs gently on a hard surface and peel under running water.
- Make filling: Halve the eggs and mix yolks with mayonnaise, mustard, salt, pepper, paprika, and food coloring until smooth.
- Pipe: Use a piping bag to fill egg whites with the yolk mixture in a swirled pattern.
- Decorate: Create ridges using a knife or toothpick and insert chive pieces as stems.
- Chill: Refrigerate for at least 30 minutes before serving.
Nutrition
- Serving Size: 1 deviled egg (30g)
- Calories: 70
- Sugar: 0g
- Sodium: 90mg
- Fat: 5g
- Saturated Fat: 1g
- Unsaturated Fat: 4g
- Trans Fat: 0g
- Carbohydrates: 1g
- Fiber: 0g
- Protein: 6g
- Cholesterol: 186mg