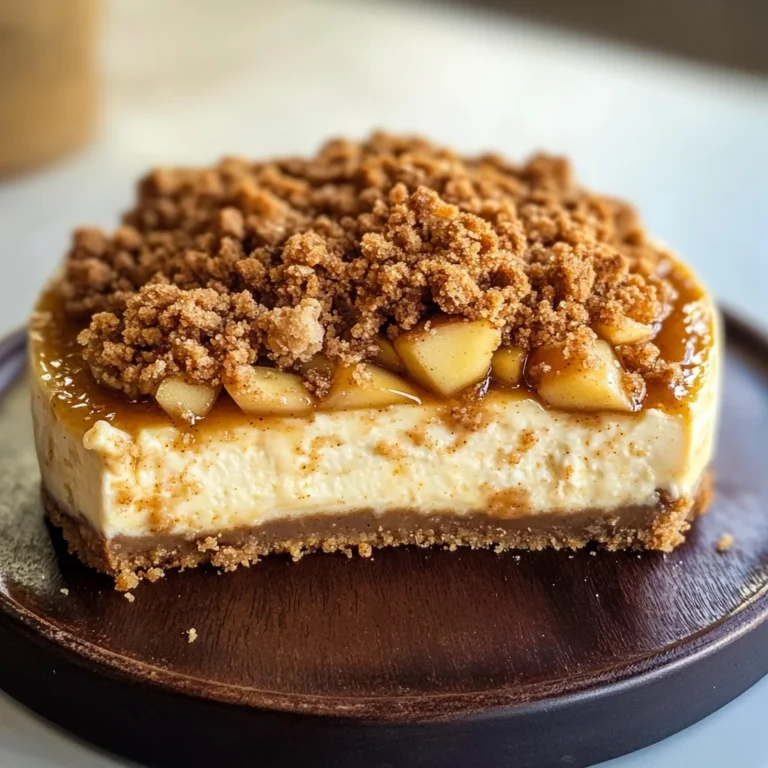
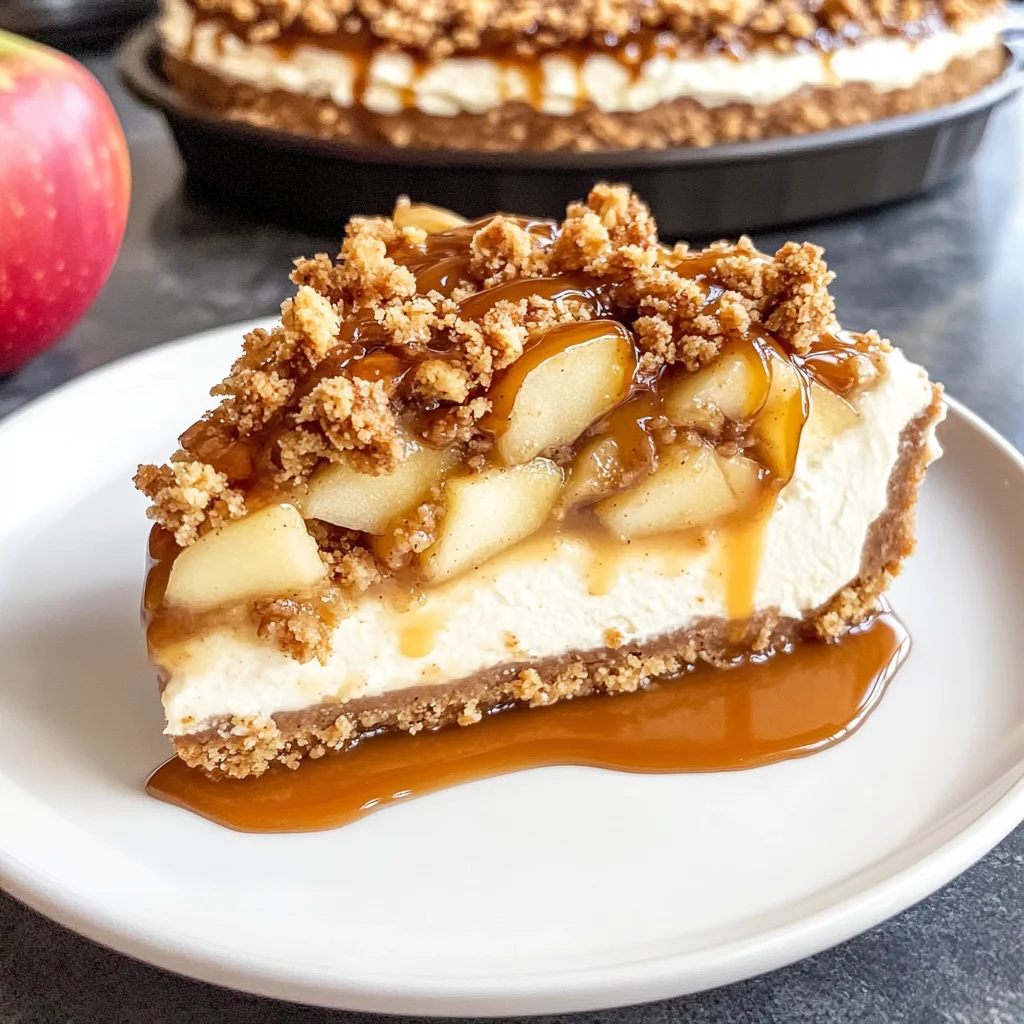
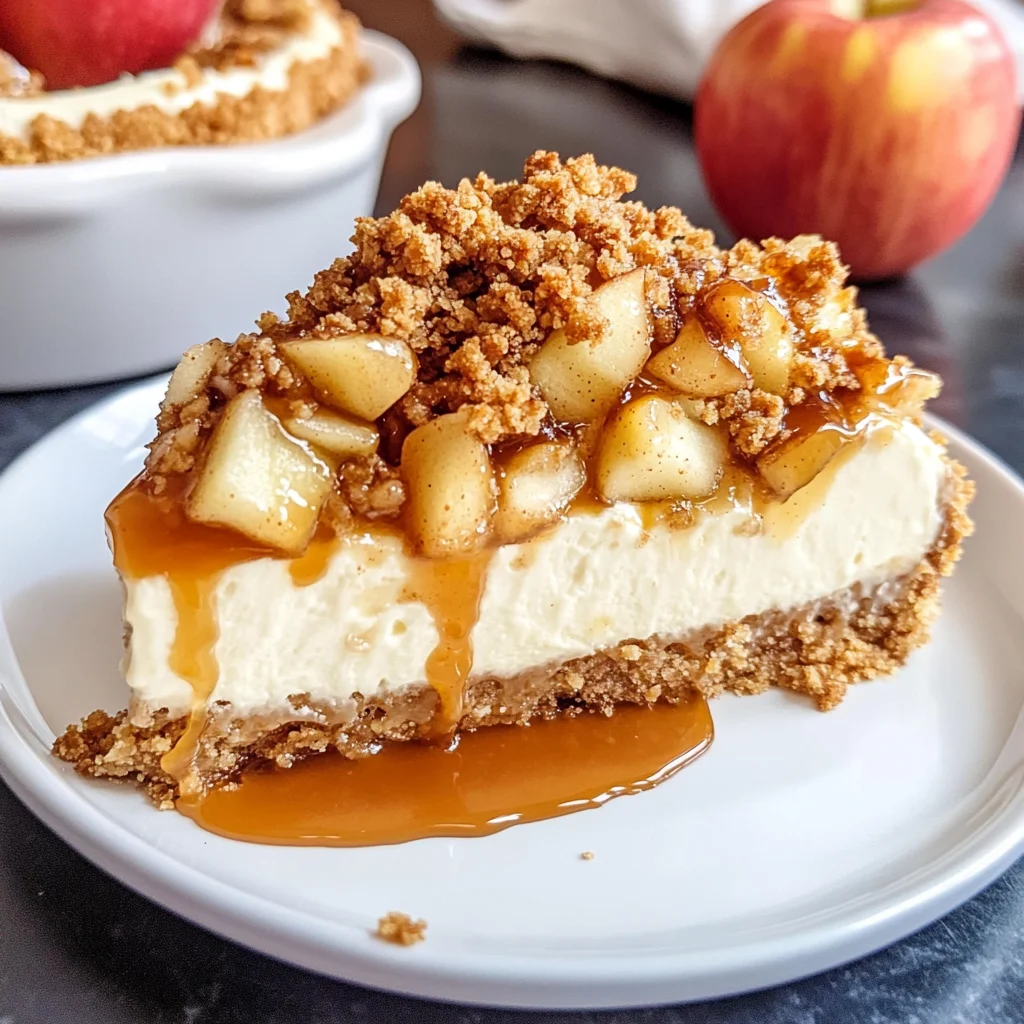
Apple Crisp Cheesecake
If you’re looking for a cozy dessert that wraps you in warmth, then this Apple Crisp Cheesecake is just the treat you need! Combining the creamy goodness of cheesecake with the delightful crunch of apple crisp, it’s a recipe that brings smiles to every gathering. Whether it’s a busy weeknight or a special family celebration, this dessert never fails to impress. It’s simple yet indulgent, making it a favorite in my home.
The best part? You can whip it up ahead of time and savor every bite, topped with a drizzle of salted caramel. Trust me, once you try this Apple Crisp Cheesecake, it will become a go-to for all your sweet cravings!
Why You’ll Love This Recipe
- Easy to prepare: This recipe comes together smoothly and doesn’t require any fancy techniques.
- Family-friendly appeal: Everyone from kids to adults loves the combination of creamy cheesecake and spiced apples.
- Make-ahead convenience: Perfect for parties or potlucks as you can bake it in advance.
- Delicious flavor: The blend of tangy cream cheese and warm cinnamon apples creates an irresistible taste sensation.
Ingredients You’ll Need
These ingredients are simple and wholesome, making your baking experience enjoyable and rewarding. Get ready to gather everything you need for this delicious Apple Crisp Cheesecake!
For the Crust
- 3 cups graham crumbs
- 3 tablespoons brown sugar
- 1/2 teaspoon cinnamon
- 1/2 cup unsalted butter (melted)
For the Apples
- 2 large apples (I recommend Granny Smith or Gala)
- 2 tablespoons brown sugar
- 1 1/2 teaspoons cinnamon
For the Topping
- 1/2 cup all-purpose flour
- 1/2 cup brown sugar
- 1 teaspoon cinnamon
- 1/2 cup quick oats
- 1/4 cup unsalted butter (melted)
For the Cheesecake Filling
- 24 ounces full-fat cream cheese (room temperature)
- 3/4 cup granulated sugar
- 1/4 cup brown sugar
- 1/2 teaspoon cinnamon
- 1 tablespoon cornstarch (or 2 tablespoons all-purpose flour)
- 1 teaspoon vanilla extract
- 1/2 cup sour cream (room temperature)
- 3 large eggs (room temperature)
For Baking
- boiling water (for the water bath)
- salted caramel sauce (for drizzling)
Variations
One of the beauties of this Apple Crisp Cheesecake is its flexibility. Feel free to mix things up based on your preferences or what you have on hand!
- Swap the fruit: Try using pears or peaches instead of apples for a different twist.
- Add nuts: Incorporate chopped pecans or walnuts into the topping for an extra crunch.
- Change up the spices: Experiment with nutmeg or ginger for a unique flavor profile.
- Make it gluten-free: Substitute graham crumbs with gluten-free alternatives for those with dietary restrictions.
How to Make Apple Crisp Cheesecake
Step 1: Prepare Your Oven and Pan
Preheat your oven to 350°F (180°C). This step is crucial because starting with a hot oven helps set your cheesecake perfectly. While that’s heating up, take a 9-inch springform pan and wrap its outside in tin foil. Make sure you cover it well—this prevents water from seeping in during baking. Then, lightly grease the pan with non-stick spray so that your cheesecake releases easily after baking.
Step 2: Create the Graham Cracker Crust
In a bowl, combine graham crumbs, brown sugar, cinnamon, and melted butter. Mix until everything is evenly coated and crumbly. Press this mixture firmly into the bottom of your prepared springform pan. This crust acts as a delicious base that holds all that creamy filling!
Step 3: Prepare the Apple Filling
Peel and slice your apples into thin pieces—this allows them to cook nicely in the oven. Toss them in brown sugar and cinnamon until they are well-coated. The sweetness will enhance their natural flavor while baking.
Step 4: Make the Oatmeal Topping
In another bowl, mix together flour, brown sugar, cinnamon, quick oats, and melted butter until crumbly. This topping adds that signature crispiness on top of your cheesecake!
Step 5: Prepare the Cheesecake Filling
In a large mixing bowl, beat room-temperature cream cheese until smooth. Gradually add granulated sugar and brown sugar while mixing well. Follow with cinnamon, cornstarch (or flour), vanilla extract, sour cream, and eggs—beating each addition until fully combined. This filling is what makes your cheesecake rich and creamy!
Step 6: Assemble Your Cheesecake
Pour half of your cheesecake filling over the crust first. Layer on half of your apple slices followed by half of your oatmeal topping. Repeat with the remaining filling, apples, and topping again.
Step 7: Bake in a Water Bath
Place your springform pan inside another larger pan filled with boiling water—this water bath helps keep your cheesecake moist during baking! Bake for about 55 minutes or until slightly jiggly in the center.
Step 8: Chill Before Serving
Once baked, let it cool at room temperature before chilling it in the fridge for at least four hours—or preferably overnight! When you’re ready to serve, drizzle with salted caramel sauce for that extra touch of sweetness.
And there you have it—a delightful Apple Crisp Cheesecake that is sure to be everyone’s favorite! Enjoy every bite!
Pro Tips for Making Apple Crisp Cheesecake
Creating the perfect Apple Crisp Cheesecake is all about attention to detail and a few handy tricks. Follow these pro tips to ensure your cheesecake turns out perfectly every time!
- Use room temperature ingredients: Allowing your cream cheese, eggs, and sour cream to come to room temperature helps them blend more smoothly, resulting in a creamier texture.
- Don’t skip the water bath: Baking your cheesecake in a water bath prevents it from cracking and keeps it moist. The steam created by the boiling water ensures even cooking.
- Let it chill properly: After baking, let your cheesecake cool in the oven with the door slightly ajar, then refrigerate for at least 4 hours (or overnight) before serving. This enhances the flavor and texture.
- Adjust sweetness as needed: Taste your apple mixture before adding it to the cheesecake filling. Depending on the tartness of your apples, you might want to adjust the sugar accordingly.
- Experiment with toppings: Feel free to customize your cheesecake with different toppings like nuts or fresh whipped cream alongside the salted caramel for added texture and flavor.
How to Serve Apple Crisp Cheesecake
When it comes to serving this delightful dessert, presentation is key! Here are some ideas to make your Apple Crisp Cheesecake shine at any gathering.
Garnishes
- Drizzle of salted caramel: A generous drizzle of salted caramel sauce not only adds sweetness but also provides a beautiful contrast against the creamy cheesecake.
- Chopped nuts: Sprinkle some chopped pecans or walnuts on top for an extra layer of crunch that complements the soft apples and creamy filling.
Side Dishes
- Vanilla ice cream: The classic pairing with any cheesecake! A scoop of vanilla ice cream adds a rich, creamy element that balances out the flavors beautifully.
- Whipped cream: Light and airy whipped cream makes a lovely accompaniment, providing a refreshing contrast to the dense cheesecake.
- Fresh fruit salad: A colorful mix of seasonal fruits can brighten up your plate and add a fresh touch that complements the apple flavors perfectly.
- Coffee or chai tea: Serving coffee or chai tea alongside your cheesecake enhances its comforting qualities, making for a warm and inviting dessert experience.
Enjoy crafting this delicious Apple Crisp Cheesecake! With these tips and serving suggestions, you’re bound to impress family and friends alike. Happy baking!
Make Ahead and Storage
This Apple Crisp Cheesecake is perfect for meal prep and can be made ahead of time, allowing you to enjoy it at your convenience. Whether you’re planning a gathering or just want to treat yourself throughout the week, this creamy dessert stays delicious!
Storing Leftovers
- Allow the cheesecake to cool completely before storing.
- Cover it tightly with plastic wrap or aluminum foil.
- Store in the refrigerator for up to 5 days.
Freezing
- Wrap individual slices or the whole cheesecake in plastic wrap and then in aluminum foil.
- Place in an airtight container or freezer bag.
- Freeze for up to 3 months for best quality.
Reheating
- Thaw the cheesecake overnight in the refrigerator before serving.
- For individual slices, warm them gently in the microwave for about 10-15 seconds to soften.
FAQs
Here are some common questions about making Apple Crisp Cheesecake:
Can I make Apple Crisp Cheesecake without sour cream?
Absolutely! You can substitute the sour cream with plain Greek yogurt for a similar tangy flavor and creamy texture.
What makes Apple Crisp Cheesecake different from regular cheesecake?
Apple Crisp Cheesecake combines a classic creamy vanilla filling with spiced apples and a crunchy oatmeal crumble on top, creating a delightful blend of textures and flavors.
How should I serve Apple Crisp Cheesecake?
For the best experience, serve chilled and drizzle with salted caramel sauce. It pairs beautifully with whipped cream or vanilla ice cream too!
Can I use different types of apples in this recipe?
Yes! While Granny Smith and Gala are great choices, feel free to experiment with other apple varieties like Fuji or Honeycrisp for a unique taste.
How long does Apple Crisp Cheesecake last in the fridge?
When stored properly, this cheesecake can last up to 5 days in the refrigerator. Just make sure it’s well-covered!
Final Thoughts
I hope you enjoy making this Apple Crisp Cheesecake as much as I do! It’s a wonderful blend of creamy cheesecake, spiced apples, and crunchy topping that captures all the cozy flavors of fall. Whether it’s for a special occasion or just because, this dessert is bound to impress. Happy baking, and may your kitchen be filled with warmth and sweetness!
Apple Crisp Cheesecake
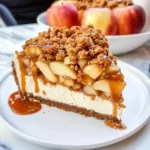
Indulge in the warmth of our Apple Crisp Cheesecake, a delightful fusion of creamy cheesecake and spiced apple topping nestled in a buttery graham cracker crust. This dessert is perfect for any occasion, from cozy family dinners to festive gatherings. The rich flavors of tangy cream cheese combined with sweet apples and a crunchy oatmeal crumble will leave everyone craving more. Plus, it can be made ahead, allowing you to savor each bite topped with luscious salted caramel. With this easy-to-follow recipe, your next dessert will surely impress!
- Prep Time: 30 minutes
- Cook Time: 55 minutes
- Total Time: 1 hour 25 minutes
- Yield: Serves approximately 12 slices 1x
- Category: Dessert
- Method: Baking
- Cuisine: American
Ingredients
- 3 cups graham crumbs
- 3 tablespoons brown sugar
- 1/2 teaspoon cinnamon
- 1/2 cup unsalted butter (melted)
- 2 large apples
- 2 tablespoons brown sugar
- 1 1/2 teaspoons cinnamon
- 1/2 cup all-purpose flour
- 1/2 cup brown sugar
- 1 teaspoon cinnamon
- 1/2 cup quick oats
- 1/4 cup unsalted butter (melted)
- 24 ounces full-fat cream cheese (room temperature)
- 3/4 cup granulated sugar
- 1/4 cup brown sugar
- 1/2 teaspoon cinnamon
- 1 tablespoon cornstarch (or 2 tablespoons all-purpose flour)
- 1 teaspoon vanilla extract
- 1/2 cup sour cream (room temperature)
- 3 large eggs (room temperature)
- boiling water (for the water bath)
- salted caramel sauce (for drizzling)
Instructions
- Preheat oven to 350°F (180°C) and wrap a 9-inch springform pan in foil.
- Mix graham crumbs, brown sugar, cinnamon, and melted butter; press into the pan for the crust.
- Slice apples and toss with brown sugar and cinnamon.
- Combine flour, brown sugar, cinnamon, quick oats, and melted butter for the topping.
- Beat cream cheese until smooth; add sugars, cinnamon, cornstarch (or flour), vanilla extract, sour cream, and eggs until well combined.
- Layer half of the cheesecake filling on the crust followed by half of the apples and topping; repeat.
- Bake in a water bath for about 55 minutes until slightly jiggly in the center.
- Chill for at least four hours before serving with salted caramel drizzle.
Nutrition
- Serving Size: 1 serving
- Calories: 320
- Sugar: 22g
- Sodium: 245mg
- Fat: 18g
- Saturated Fat: 10g
- Unsaturated Fat: 6g
- Trans Fat: 0g
- Carbohydrates: 34g
- Fiber: 2g
- Protein: 5g
- Cholesterol: 80mg